Rolling Low Plank Tutorial
Rolling low plank both sides is a challenging core exercise that combines a low plank with controlled rotation into a side plank on each side. It builds deep core strength, shoulder stability, and anti-rotation control using only your bodyweight.
This move is best for intermediate to advanced trainees who already know how to hold a solid low plank. Focus on slow transitions, steady breathing, and keeping your hips stacked as you rotate. If you are looking for a guide or tutorial on how to improve plank strength and rotational control, this exercise fits perfectly.
Benefits
- Builds strong and stable abs
- Trains obliques through rotation
- Improves shoulder and hip stability
- Enhances body control and balance
- Strengthens the core without equipment
- Supports better posture and bracing
Setup & Starting Position
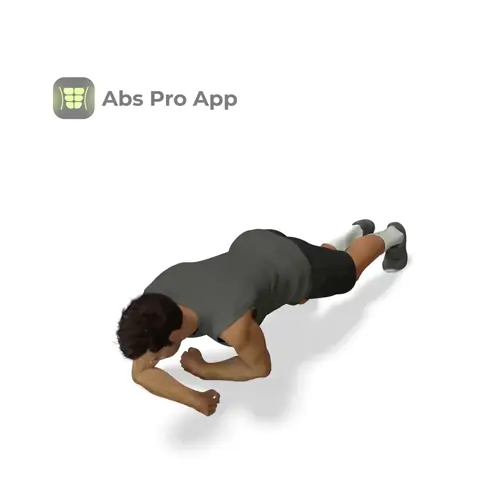
Begin on the floor in a low plank position. Place your forearms on the ground with elbows directly under your shoulders. Your forearms should be parallel, palms facing down or lightly clasped. Extend both legs straight behind you with toes tucked under.
Create a straight line from your head to your heels. Squeeze your glutes, tighten your thighs, and gently brace your abs as if preparing for a light cough. Keep your neck neutral and eyes looking down at the floor.
Before starting the first rep, check that your shoulders are not shrugging toward your ears and your hips are not sagging or piking up. Quick setup tip, lightly push the floor away with your forearms to create upper body tension and stability.
How To Do Rolling low plank (Step-by-step)
- Start in a stable low plank on your forearms
- Shift weight slightly into your left forearm
- Rotate your torso to the right
- Lift your right arm straight up toward the ceiling
- Hold the side plank briefly with hips stacked
- Lower the right arm and rotate back to center
- Stabilize in the low plank again
- Shift weight into your right forearm
- Rotate to the left side plank
- Extend your left arm upward
- Control the return back to low plank
- Continue alternating sides for reps or time
Form Cues
- Elbows under shoulders
- Body in one straight line
- Move slow and controlled
- Stack hips
- Brace abs before rotating
- Do not rush the switch
Breathing & Bracing
Proper breathing makes this exercise much more effective and safer. Before you start, take a calm inhale through your nose and lightly brace your core, as if tightening a wide belt around your waist.
As you rotate into the side plank, exhale slowly through your mouth. This helps control the movement and keeps your ribs from flaring. Hold a gentle brace in the side plank position without holding your breath.
When you return to the center low plank, take a short inhale to reset. Repeat the same breathing pattern on the other side. A simple rhythm to follow is inhale in the center, exhale during the rotation. Your goal is steady breathing with constant core tension, not breath holding.
Common Mistakes
- Letting hips sag, fix by squeezing glutes and bracing abs harder
- Rushing the rotation, slow down and stay controlled
- Elbows too far forward, reset them under shoulders
- Shrugging shoulders, push the floor away with forearms
- Twisting neck upward, keep head in line with spine
How It Should Feel
Quick self-check, this exercise should feel demanding but controlled.
Good signs include strong tension in your abs and obliques, steady shoulders, and the ability to rotate without wobbling. You should feel your core working more than your arms.
Warning signs include sharp pain in the shoulder, elbow, or lower back. Stop immediately if you feel sharp pain or joint discomfort.
If you feel it mostly in your neck, relax your head and focus on pushing through your forearms. If your lower back feels strained, slow down and tighten your glutes and abs before rotating.
Alternative Names
rolling plank to side plank, rotating low plank
Variations
Easier
- Low plank hold, stay in a static forearm plank and build endurance
- Side plank from knees, perform the side plank portion with knees down
Harder
- Rolling low plank with leg raise, lift the top leg in side plank
- Slow tempo rolling plank, add a 3 to 5 second pause on each side
Sample Workout
Core Stability Workout
- Low plank hold, 30 seconds
- Rolling low plank both sides, 6 to 10 reps per side
- Dead bug, 10 reps per side
- Glute bridge, 15 reps
Rest 45 to 60 seconds and repeat for 2 to 3 rounds. Focus on quality movement rather than speed.
Progression Plan
Week 1, perform rolling low plank both sides for 4 to 6 reps per side. Focus on slow transitions and perfect form. Rest as needed between sets and stop before fatigue causes form breakdown.
Week 2, increase to 8 to 10 reps per side or add a 2 second hold in each side plank. Keep breathing steady and hips stacked.
Week 3, slow the tempo further or reduce rest time between sets. You can also add an advanced variation like a top leg raise if control stays solid.
Repeat a week if you lose balance or rush the movement. Progress only when you can maintain clean technique on every rep.
FAQ
How many reps should I do?
Start with 6 to 8 controlled reps per side and build up gradually.
Is this exercise safe for beginners?
It is advanced, beginners should master low planks and side planks first.
Should my feet be stacked or staggered?
Stack your feet to match the intended difficulty and balance demand.
Can I hold the side plank longer?
Yes, brief holds increase time under tension and control.
Summary
The rolling low plank both sides is an excellent way to challenge your abs and obliques without equipment. It rewards patience, control, and proper bracing.
Move with intention, breathe steadily, and focus on staying strong through every transition. As your core stability improves, this exercise can become a powerful part of your abs training routine and overall body control.
Get Defined Abs in 30 Days
This exercise is part of our complete 30-day ab program. Download the app for structured daily workouts and track your progress.