One Leg Side Tuck And Leg Raise Tutorial
One Leg Side Tuck and Leg Raise is a beginner friendly, no equipment abs exercise performed seated on one hip. It combines a knee tuck with a diagonal leg raise to gently train the core, hips, and lower abs.
This move is ideal if you are looking for a how to do side abs exercises guide that is easy on the lower back. Focus on controlled movement, staying tall through the chest, and moving the top leg smoothly from tuck to extension. It works well in warm ups, light core days, or rehab style routines.
Benefits
- Strengthens the abs without spinal flexion
- Improves hip control and coordination
- Trains the obliques in a gentle way
- Helps build mind muscle connection
- Low impact and joint friendly
- Great for beginners and recovery days
Setup & Starting Position
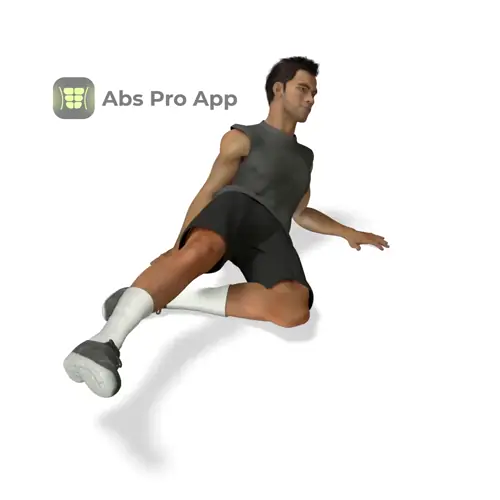
Start by sitting on the floor and shifting your weight onto one hip. Your bottom leg stays bent on the floor with the knee pointing slightly forward. The top leg is free to move.
Place the hand closest to the floor slightly behind your body, palm flat, fingers pointing away or to the side. This hand provides balance and light support, not heavy pushing. Keep the other hand relaxed on your thigh or hovering in front of your body.
Lift your chest tall and gently brace your abs as if preparing for a cough. The top knee starts bent and tucked slightly toward your chest. Your spine stays long and neutral, not rounded.
Quick setup tip: If you feel unstable, move your supporting hand a little farther from your body to widen your base.
How To Do One leg side tuck and leg raise (Step-by-step)
- Sit on one hip with the bottom leg bent and stable
- Place your supporting hand on the floor behind you
- Tuck the top knee toward your chest under control
- Extend the top leg forward, keeping it off the floor
- Lift the extended leg diagonally upward
- Pause briefly at the top while staying tall
- Lower the leg back to the extended position
- Bend the knee back into the tuck
- Repeat for reps, then switch sides
Form Cues
- Stay tall through the chest
- Move slowly and smoothly
- Keep abs gently braced
- Do not lean back
- Lift with control, not momentum
- Relax the neck and shoulders
Breathing & Bracing
Start each rep by gently bracing your core, as if tightening a wide belt around your waist. This creates stability without stiffening your whole body.
Inhale softly as you tuck the knee in. As you extend and lift the leg diagonally, exhale through pursed lips. The exhale helps the abs engage and keeps the movement controlled.
A simple rhythm to repeat is inhale on the tuck, exhale on the extend and lift. Keep breathing continuously and avoid holding your breath.
Your ribs should stay stacked over your hips. If you feel your lower back arching or your ribs flaring, reduce the height of the leg raise and slow the tempo.
Common Mistakes
- Leaning too far back, fix by sitting taller and moving slower
- Swinging the leg with momentum, fix by pausing briefly at each phase
- Locking the supporting arm, fix by keeping a soft elbow
- Rounding the lower back, fix by engaging the abs before moving
- Lifting the leg too high, fix by staying in a pain free range
How It Should Feel
Quick Self Check:
Good signs: You feel gentle tension in the abs and side of the waist, the movement feels smooth and controlled, and your posture stays tall throughout each rep.
Warning signs: Sharp pain in the hip or lower back, pinching in the front of the hip, or loss of balance. Stop immediately if you feel sharp pain.
If you feel it mostly in your neck or shoulders, relax your upper body and use less pressure through the supporting hand. If you feel it in your lower back, reduce the range of motion and focus more on bracing before moving the leg.
Variations
Easier
- Partial range side tuck: Extend the leg only halfway before returning to the tuck
- Toe tap version: Lightly tap the heel to the floor between reps for more stability
Harder
- Straight leg side raise: Skip the knee tuck and lift the straight leg diagonally with slow tempo
Sample Workout
Beginner Core Workout:
- Seated One Leg Side Tuck and Leg Raise, 2 sets of 8 to 10 reps per side
- Dead bug, 2 sets of 6 to 8 reps per side
- Glute bridge, 2 sets of 10 reps
Rest 30 to 45 seconds between exercises. Focus on control rather than speed.
Progression Plan
Week 1: Perform 2 sets of 8 reps per side. Use a slow, comfortable tempo and focus on learning the movement pattern. Rest 45 seconds between sets.
Week 2: Increase to 10 to 12 reps per side. Add a one second pause at the top of the diagonal leg raise. Keep rest periods the same.
Week 3: Slow the lowering phase to three seconds. Stay at the same rep range until you can maintain perfect control.
Move to the advanced straight leg variation once you can complete all reps without leaning back or losing balance. Repeat a week if form starts to break down.
FAQ
Should my leg be straight at the top?
Yes, the top leg should be fully extended during the diagonal raise, but not locked.
Where should I feel this exercise?
Mostly in the abs, obliques, and outer hip of the working leg.
Can I do this every day?
Yes, as long as it feels comfortable and you keep the volume moderate.
How high should I lift my leg?
Only as high as you can while keeping your torso tall and controlled.
Summary
The One Leg Side Tuck and Leg Raise is a simple but effective way to train your abs and hips using only your bodyweight. When done with control, it builds coordination, core awareness, and gentle strength.
Use this exercise as part of a balanced core routine, focus on smooth movement, and progress gradually. Small improvements in control and posture make a big difference over time.
Get Defined Abs in 30 Days
This exercise is part of our complete 30-day ab program. Download the app for structured daily workouts and track your progress.