One Arm Plank Tutorial
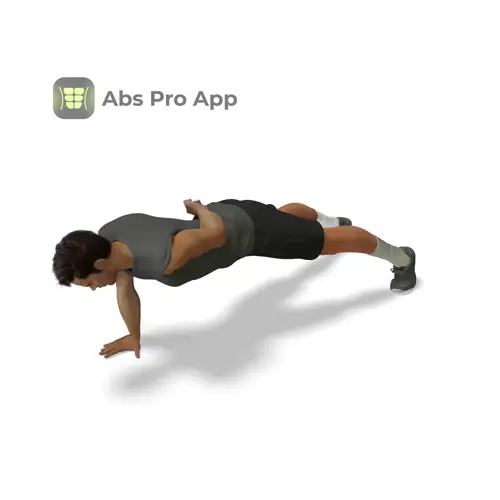
One Arm Plank is an advanced core stability exercise where you hold a high plank while supporting your body on just one hand, with the other arm resting on your back. This variation challenges your abs, shoulders, and hips to resist rotation and sagging.
It is ideal for experienced trainees looking to build serious core control, shoulder stability, and full body tension. Focus on keeping your hips and shoulders level with the floor and maintaining steady breathing throughout the hold.
Benefits
- Builds strong anti-rotation core strength
- Improves shoulder stability and control
- Enhances full body tension awareness
- Reinforces proper plank alignment
- Transfers well to athletic movements
- Challenges balance without equipment
Setup & Starting Position
Begin on the floor in a standard high plank position. Place your hands directly under your shoulders, arms straight, and legs extended with toes tucked under. Your body should form a straight line from head to heels.
Set your feet slightly wider than hip width to create a more stable base, which is important before removing one hand. Engage your glutes and gently draw your ribs down so your lower back stays neutral.
Once stable, shift your weight slightly toward one side and slowly place the opposite hand on your lower back. The supporting hand stays firmly planted, fingers spread for grip.
Setup tip: Before lifting a hand, pause for a breath and make sure your hips are not already rotating.
How To Do One arm plank (Step-by-step)
- Start in a high plank on both hands
- Set your feet wider than usual for balance
- Brace your core and squeeze your glutes
- Shift weight slightly onto one hand
- Place the free hand on your lower back
- Keep shoulders and hips level with the floor
- Hold the position with steady tension
- Breathe calmly while maintaining alignment
- Finish the hold and return the hand to the floor
- Switch sides if prescribed
Form Cues
- Press the floor away
- Hips square to the ground
- Neck long and relaxed
- Glutes tight
- Feet wide and grounded
- No shifting side to side
Breathing & Bracing
Use calm, controlled breathing to maintain stability during the one arm plank. Inhale through your nose before lifting one hand and gently brace your core as if preparing for a light cough.
As you hold the plank, breathe slowly through your nose or mouth without letting your ribs flare up. Each exhale should reinforce tension in your abs, helping you stay balanced.
A simple rhythm is to inhale for three seconds and exhale for three seconds while holding. Avoid holding your breath, as this can cause loss of control or shoulder strain.
Think of breathing around your brace, not relaxing it.
Common Mistakes
- Rotating the hips, fix by widening your stance and bracing harder.
- Sagging lower back, fix by squeezing glutes and pulling ribs down.
- Shrugging the supporting shoulder, fix by pressing the floor away.
- Holding breath, fix by using slow counted breaths.
- Rushing into the position, fix by setting balance first.
How It Should Feel
Quick self-check:
Good signs: You feel strong tension in your abs, steady work in the supporting shoulder, and your body stays mostly still. The plank feels challenging but controlled.
Warning signs: Sharp pain in the shoulder, wrist, or lower back means stop immediately. Excessive shaking paired with loss of alignment is also a sign to regress.
If you feel it mainly in your neck, relax your head and look slightly ahead of your hands. If your lower back feels strained, reset and focus on glute squeeze and rib control before continuing.
Alternative Names
single arm plank, one hand plank
Variations
Easier
- Wide stance high plank: Keep both hands down and practice resisting hip movement.
- One arm plank with hand tap: Briefly lift one hand, tap the floor, then return.
Harder
- One arm plank with feet together: Narrow your base to increase anti-rotation demand.
- One arm plank shoulder taps: From a one arm base, lightly tap the chest or shoulder.
Sample Workout
Core Stability Workout
- High plank, 30 seconds
- One arm plank, 20 to 30 seconds per side
- Dead bug, 10 reps per side
- Side plank, 30 seconds per side
Rest 45 to 60 seconds between exercises. Complete 2 to 3 rounds focusing on control, not speed.
Progression Plan
Week 1: Practice wide stance high planks and short one arm holds. Aim for 3 sets of 15 seconds per side. Rest fully and focus on perfect alignment.
Week 2: Increase hold time to 20 to 30 seconds per side. Reduce foot width slightly while maintaining control. Keep rest periods around 60 seconds.
Week 3: Progress to feet closer together or add a brief pause before placing the free hand on your back. Only advance if hips stay level.
If form breaks down, repeat the previous week. Progress by improving control and breathing before adding time.
FAQ
Should my feet be wide or narrow?
Wider feet make the exercise more stable. Narrowing them increases difficulty.
Is one arm plank safe for wrists?
It can be demanding. Warm up your wrists and stop if pain appears.
How long should I hold one side?
Most people start with 15 to 30 seconds per side with good form.
Do I need to switch sides?
Yes, always train both sides evenly to avoid imbalances.
Summary
The one arm plank is a powerful way to test and build real core stability. It demands focus, patience, and full body tension.
Train it with intention, keep your hips and shoulders level, and breathe steadily. When done correctly, it will strengthen not just your abs, but your entire movement foundation.
Master the basics, progress gradually, and use this exercise as a benchmark for true core control.
Get Defined Abs in 30 Days
This exercise is part of our complete 30-day ab program. Download the app for structured daily workouts and track your progress.