Ball Bounce Crunches Tutorial
Ball bounce crunches are a bodyweight abs exercise that combine a basic crunch with an alternating reach and twist. Even though the name mentions a ball, this version uses no equipment and relies on controlled arm reaches to create the same core challenge. This move is great for people looking for a how to do crunches with rotation tutorial that adds variety without adding complexity. It mainly targets the abs while also training coordination and control. Focus on slow, intentional movement, keeping your lower back supported and your neck relaxed. This exercise works well in warm-ups, core finishers, or beginner-to-intermediate ab routines.
Benefits
- Strengthens the abdominal muscles
- Trains rotational core control
- Improves mind to muscle connection
- Low impact and joint friendly
- No equipment needed
- Easy to scale up or down
- Helps build better crunch technique
Setup & Starting Position
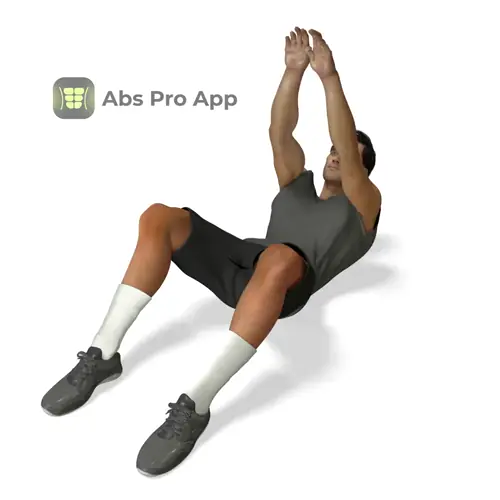
Lie flat on your back on a comfortable surface such as a mat or carpet. Bend your knees and place your feet flat on the floor about hip width apart. Your heels should be close enough that you can lightly touch them with your fingertips if needed. Extend both arms straight up toward the ceiling with palms facing each other, as if you are holding an invisible ball above your chest.
Let your head rest comfortably on the floor and keep your neck long. Gently draw your ribs down so your lower back stays lightly pressed into the ground. This helps protect your spine and keeps the work in your abs. Before starting the first rep, take a slow breath in and brace your core by tightening your stomach slightly, as if preparing for a cough.
Setup tip: If your lower back arches off the floor, bring your feet slightly closer to your body and focus on keeping your ribs down.
How To Do Ball bounce crunches (Step-by-step)
- Lie on your back with knees bent and feet flat on the floor
- Reach both arms straight up toward the ceiling
- Inhale to prepare and brace your core
- Exhale as you lift your shoulders into a crunch
- At the top, twist your torso to the left while reaching upward
- Lower your shoulders back down with control
- Reset your arms straight up
- Exhale and crunch up again
- Twist your torso to the right while reaching upward
- Lower slowly to the floor
- Continue alternating left and right with steady tempo
Form Cues
- Reach up, not forward
- Twist from the ribs
- Keep feet flat on the floor
- Lower back stays down
- Neck stays relaxed
- Slow and controlled reps
Breathing & Bracing
Proper breathing makes a big difference in how effective ball bounce crunches feel. Start each rep by inhaling through your nose while lying on the floor. As you begin the crunch, gently tighten your abs and exhale through your mouth. This exhale should match the effort of lifting your shoulders and twisting.
Think of bracing your core like tightening a wide belt around your waist. Your stomach should feel firm, but you should still be able to breathe. Avoid holding your breath, as this can increase neck tension and reduce control. When you lower back down, take another small inhale to reset.
A simple rhythm you can repeat is inhale at the bottom, exhale as you crunch and twist, inhale as you return. Keep your ribs stacked over your hips and avoid letting your chest flare up. Controlled breathing helps keep the movement smooth and protects your lower back.
Common Mistakes
- Pulling on the neck, fix it by keeping arms reaching upward instead
- Lifting feet off the floor, fix it by slowing the tempo
- Rushing through reps, fix it by pausing briefly at the top
- Over twisting the shoulders, fix it by rotating only as far as control allows
- Arching the lower back, fix it by bracing the abs before each rep
- Holding the breath, fix it by exhaling during the crunch
How It Should Feel
Quick Self-Check
You should feel a clear contraction in the front of your abs, with extra engagement on the sides of your waist as you twist. The movement should feel controlled, not jerky. Your neck and shoulders may feel lightly involved, but they should not be straining.
Good signs:
You should feel a clear contraction in the front of your abs, with extra engagement on the sides of your waist as you twist. The movement should feel controlled, not jerky. Your neck and shoulders may feel lightly involved, but they should not be straining.
Good signs:
- Abs feel tired and warm by the end of the set
- You can control the lowering phase
- Breathing stays steady
- Sharp pain in the neck or back, stop immediately
- Hip flexors taking over and feet lifting
Alternative Names
Alternating reach crunch
Variations
Easier
- Basic Reach Crunch, crunch straight up without twisting
- Heel Supported Crunch, place heels closer to glutes for extra support
- Short Range Crunch, lift shoulders only a few inches
Harder
- Slow Tempo Ball Bounce Crunch, add a 3 second lower
- Extended Leg Reach Crunch, lift feet off floor with knees bent
- Pause and Twist Crunch, hold the top position for 2 seconds
Sample Workout
Core Focused Bodyweight Workout
- Glute Bridge, 15 reps
- Ball Bounce Crunches, 12 reps per side
- Dead Bug, 10 reps per side
- Side Plank, 20 seconds per side
Progression Plan
Start by mastering control and breathing before adding difficulty.
Week 1: Perform ball bounce crunches 2 to 3 times per week. Do 2 sets of 8 to 10 reps per side. Focus on learning the movement, keeping your lower back down, and breathing smoothly. Rest 60 to 90 seconds between sets.
Week 2: Increase to 3 sets of 10 to 12 reps per side. Begin slowing down the lowering phase to about 2 to 3 seconds. This increases time under tension and builds better control.
Week 3: Add a brief pause at the top of each twist or try an advanced variation like the slow tempo version. Keep rest periods slightly shorter, around 45 to 60 seconds.
If form breaks down or you feel strain in your neck or back, repeat the previous week. Progress only when you can complete all reps with steady breathing and good control.
FAQ
FAQ
Is there a real ball involved?
No, this version uses no equipment. The reaching motion replaces the ball.
How many reps should I do?
Most people do 8 to 15 reps per side depending on strength.
Can beginners do this exercise?
Yes, especially if they start with small range of motion.
Is this safe for the lower back?
Yes, when done with proper bracing and control.
How fast should I move?
Slow and controlled works best for core activation.
If you have back, neck, or core related medical conditions, consult a qualified professional before performing this exercise.
Summary
Ball bounce crunches are a simple but effective way to train your abs with rotation using only your bodyweight. By focusing on controlled reaches, steady breathing, and proper bracing, you can make this exercise both safe and challenging. It fits easily into home workouts and helps build a strong foundation for more advanced core moves. Take your time, prioritize form, and let the quality of each rep drive your progress. With consistency, this exercise can become a reliable part of your abs training routine.
Get Defined Abs in 30 Days
This exercise is part of our complete 30-day ab program. Download the app for structured daily workouts and track your progress.